Tuesday, October 5, 2010
Moved to a new location..
www.neerajpattani.tumblr.com
This blog will not be updated anymore. All future posts will be posted on the new site.
Saturday, March 6, 2010
Sunday, January 10, 2010
Melon composite in Shake
Sunday, November 8, 2009
Final Year Project (FYP) Blog
This is the address: www.angelafyp.blogspot.com
All my development work, from concept to completion, for that project will be posted on that blog. My personal works will still be posted here.
Cheers!
Monday, November 2, 2009
Procedural Displacement
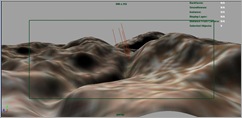
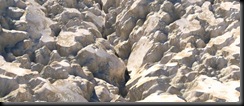
I was messing around with displacement shaders using mental Ray when I decided to test it out by creating a rough rocky mountain texture.
So I went onto creating a NURBS plane and sculpting it briefly to block out the shape.
I created a displacement shading network. I mostly used 3D textures provided by Maya and had them interconnected.
I set up the mental Ray physical sun with final gather turned on. When I did my first test render, the displacement did not show up correctly. So I went to the approximate editor to increase the displacement quality. Boy, the render time was expensive!! Roughly 20 minutes. Here’s the result.
Saturday, October 17, 2009
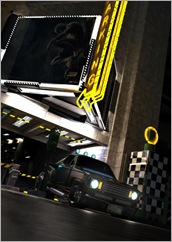
Neon & Chrome Update
I updated the shading to tone down the reflectivity. I also added the poster textures. And for a test render, I added a few area lights with quadratic decay as the tube lights, two spot lights for the car headlamps, one over soft bluish fill light and rendered with final gather. Again, it’s a rough piece:
I need more colors in the scene. Right now, it looks very desaturated and dull and the focal point is not established correctly in the scene.
Friday, October 16, 2009
Neon and Chrome Challenge
So I finally finished the fruit bowl scene which was modeled by Dan Wade. The original image is uploaded here. Comments are critiques are most welcome.
With the fruit bowl challenge done, I decided to work on another one of Jeremy Birn’s lighting challenges on CGTalk.com – Neon and Chrome. The challenge can be found here. This scene is modeled by Christophe Desse and Matthew Thain.
So the first thing I did was to UV map the pieces of geometry which were going to have texture details. Next, I moved onto creating the procedural textures for the walls and the pavement.


Saturday, October 10, 2009
Fruit Bowl Almost Complete
For the fill light pass, I had about 46 spot lights in a dome casting soft blue light with soft shadows.
For the rim light pass, I isolated the fruits only and placed a spot light behind them. I also had it adjusted to show off the subsurface scattering on the grapes.
For the GI pass, I had three spotlights emitting GI photons only from different directions at the fruit bowl. I had also enabled final gathering to achieve better results.
This is the ambient occlusion pass.
And this is what the final result looks like. I added fog and a vignette to bring focus to the fruit bowl.
However, I wouldn't call this done because of one minor mistake:
One of the cherries is floating above the plate. This was pretty frustrating. I should be able to be done by tonight.
Sunday, September 27, 2009
Adjusting lights on Fruit Bowl
So now that I've got my shaders all set-up procedurally, I was changing and revising my light set-up. I made the shadows of my key light softer and reduced the intensity of my dome of fill lights. Here's the before and after comparison:
Friday, September 25, 2009
Fruit Bowl - All Procedural Textures
Here's the shading network for all the procedural shaders in the scene:
I then rendered the scene, which took me 8 min 50 sec to render, without any final gathering or global illumination. Here's the result:
The scene looks a little overexposed. Some of the shadows are still too harsh and some things in the scene have yet to be shaded.
I plan to work on adding indirect illumination through global illumination later on after I complete shading every single object in the scene.
Tuesday, September 22, 2009
Shading Grapes using Subsurface Scattering
Monday, September 21, 2009
Bowl of Fruit - Lighting Challenge from Jeremy Birn (www.3drender.com)
I came across this website, www.3drender.com, owned by Jeremy Birn, the author of the book, Digital Lighting and Rendering. He hosts lighting challenges on the site for people to download the scenes/models and practice their lighting on. So I decided to download the oldest challenge, the bowl of fruits.
I thought this scene would be a good start to practice my lighting and shading on. Hence, I started to shade the models. I first started with the bananas. They were NURBS, in fact, most of the scene is NURBS. So I converted them to polygons and started to do the UVs. After which, I went downstairs to eat a banana and take photographs of the banana skin for use as textures.
After I handled the banana, I moved on to shading the apple. This was done procedurally. I then did the pear, which was also done procedurally. The pear was a polygon, so I converted it into a NURBS surface and then started shading it. This made my texturing process a lot easier. Here's the shading network for the apple and the pear:
Just to see the kind of look I was getting, I plugged in a HDR, added a spotlight and rendered with mental ray. Here's the result:
If anyone has any feedback on this, please write to me so that I can try to improve the shaders. Also, the cloth texture is a placeholder.
More later.
Thursday, September 17, 2009
Warrior - School Assignment
This is what I did for my school assignment. Maya and mental Ray. Based on a character sketch I did. Took 25 mins to render. NO post-processing. I was supposed to use ZBrush to add some details to the armor, but I did not have time.
Tuesday, September 15, 2009
New Portfolio Site
www.neerajpattani.daportfolio.com
This site will contain my best works. Of course this blog will still be in progress.
Cheers!


